Introduction
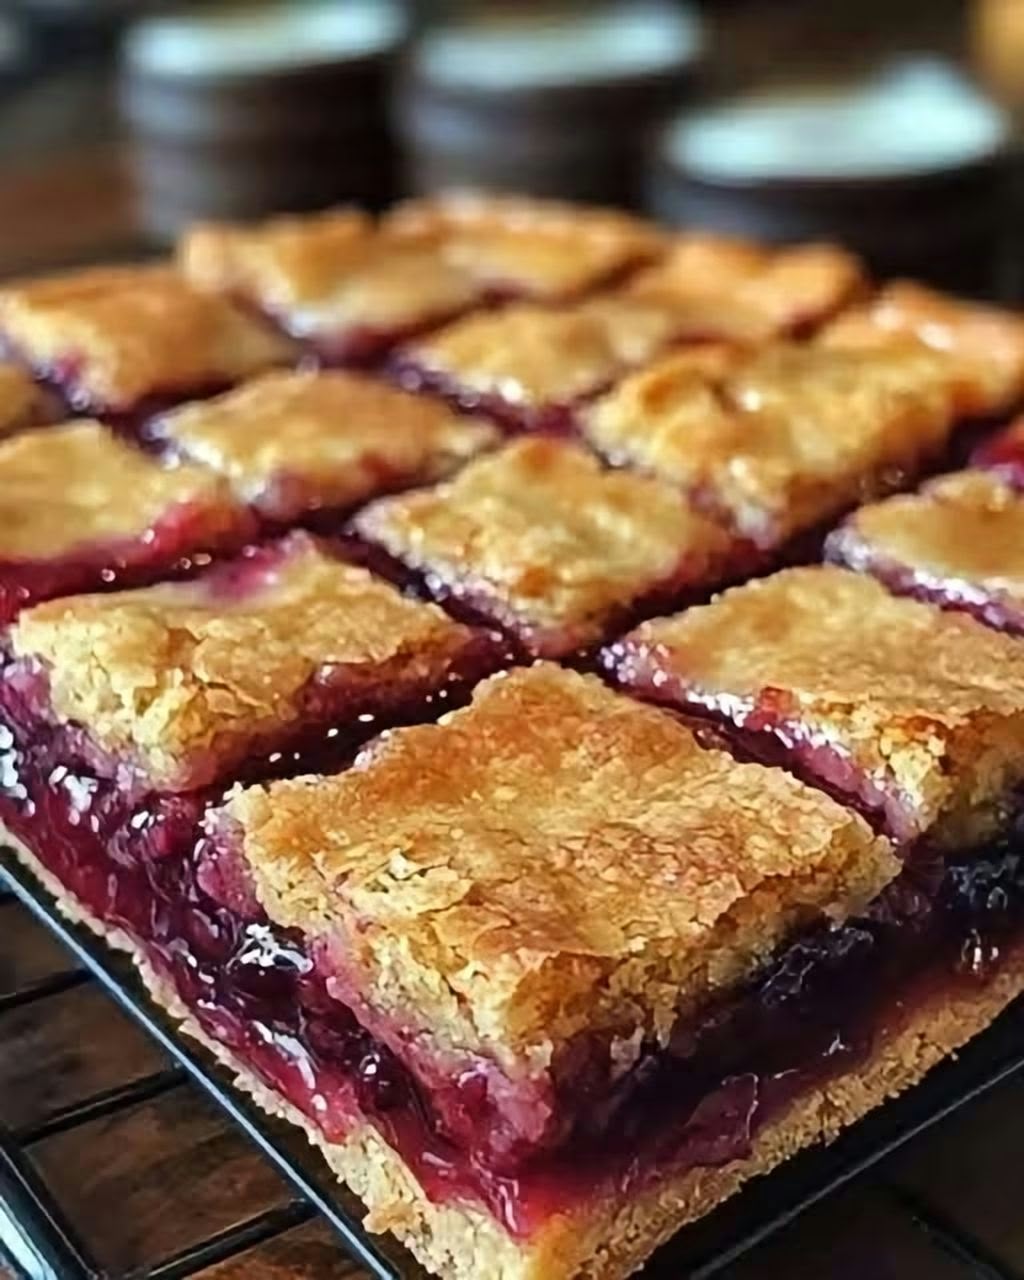
If you’re looking for a simple homemade dessert that tastes like something straight from a professional bakery, these Homemade Berry Crumble Bars are exactly what you need! With a beautifully golden, buttery crust, a thick layer of sweet and slightly tangy berry filling, and a delicious crumbly topping, every bite is pure perfection.
These bars are one of those wonderful recipes that look impressive but are surprisingly easy to prepare. You don’t need complicated techniques, fancy equipment, or hours in the kitchen. A simple buttery dough, a handful of juicy berries, and a few basic pantry ingredients are all it takes to create something truly special.
The best part is the contrast of textures. The bottom layer is firm and tender, the middle is soft, fruity, and wonderfully jammy, while the top becomes golden and slightly crisp as it bakes. Once cooled and sliced into squares, the beautiful layers make these treats look absolutely irresistible.
Whether you’re preparing something sweet for a family gathering, a weekend treat, a holiday dessert table, or simply satisfying your afternoon cravings, these Berry Crumble Bars are guaranteed to become a favorite.
History of Berry Crumble Bars
Fruit-filled pastries and crumble desserts have a long tradition in home baking, particularly in European and North American kitchens. Fruit crumbles became popular as practical desserts because they combined seasonal fruit with simple flour, butter, and sugar toppings.
Over time, home bakers developed different versions, including fruit squares, jam bars, shortbread slices, and crumb-topped pastries.
Berry Crumble Bars are a modern combination of these traditional baking ideas. They bring together the buttery richness of a shortbread-style crust and the fruity sweetness of homemade berry preserves.
There isn’t one universally established inventor or origin for this particular bar recipe, but its appeal comes from the timeless combination of fruit and buttery pastry.
Recipe Formation and Description
These delicious bars are made using three simple layers:
1. The Buttery Bottom Crust
The bottom layer is made from flour, butter, sugar, and a little baking powder. It bakes into a tender, lightly crisp foundation that holds the filling beautifully.
2. The Sweet Berry Filling
The center is packed with juicy berries cooked with sugar, lemon juice, and cornstarch. This creates a thick, glossy fruit filling that becomes wonderfully soft and jam-like.
3. The Golden Crumble Topping
The remaining dough is scattered over the fruit filling, creating a golden, slightly crunchy topping that complements the soft berry center.
Together, these three layers create a beautiful dessert with a perfect balance of sweetness, buttery flavor, and fruity freshness.
Preparation Time and Yield
- Preparation time: 20 minutes
- Cooking time: 40–45 minutes
- Cooling time: 2 hours
- Total time: Approximately 3 hours
- Servings: 16 bars
- Difficulty: Easy
- Baking temperature: 350°F (175°C)
Ingredients
For the Buttery Crust and Crumble Topping
- 2 ½ cups all-purpose flour
- ¾ cup granulated sugar
- 1 cup unsalted butter, melted
- 1 teaspoon baking powder
- ½ teaspoon salt
- 1 large egg
- 1 teaspoon vanilla extract
- ½ teaspoon ground cinnamon (optional)
For the Berry Filling
- 2 ½ cups fresh or frozen mixed berries
- ½ cup granulated sugar
- 2 tablespoons cornstarch
- 1 tablespoon fresh lemon juice
- 1 teaspoon lemon zest
- 1 teaspoon vanilla extract
You can use raspberries, blackberries, blueberries, or strawberries. A combination of raspberries and blackberries gives the filling a beautiful deep-red color.
Kitchen Equipment
- 9 × 13-inch baking pan
- Parchment paper
- Large mixing bowl
- Medium saucepan
- Whisk
- Wooden spoon or spatula
- Measuring cups and spoons
- Cooling rack
- Sharp knife
Preparation Methods
Method 1: Prepare the Baking Pan
Preheat your oven to 350°F (175°C).
Line a 9 × 13-inch baking pan with parchment paper, leaving a little extra paper hanging over the sides. This will make it much easier to lift the finished bars out of the pan.
Lightly grease the parchment paper with butter or cooking spray.
Method 2: Make the Berry Filling
- Place the berries, sugar, and lemon juice in a medium saucepan.
- Heat over medium heat, stirring occasionally.
- Allow the berries to soften and release their natural juices.
- In a small bowl, mix the cornstarch with 2 tablespoons of cold water until smooth.
- Pour the cornstarch mixture into the berries while stirring.
- Continue cooking for approximately 2–4 minutes until the mixture thickens.
- Remove the saucepan from the heat.
- Stir in the lemon zest and vanilla extract.
- Allow the filling to cool slightly before assembling the bars.
The filling should be thick and glossy rather than watery. This helps create clean layers when the bars are sliced.
Method 3: Prepare the Buttery Dough
- In a large mixing bowl, combine the flour, sugar, baking powder, and salt.
- Add the melted butter and stir until the mixture begins to form crumbs.
- Add the egg and vanilla extract.
- Mix until a soft, crumbly dough forms.
- Avoid overmixing because this can make the finished crust too dense.
The dough should resemble large, moist crumbs that hold together when pressed.
Method 4: Assemble the Layers
- Transfer approximately two-thirds of the dough into the prepared baking pan.
- Press it firmly and evenly into the bottom of the pan.
- Make sure the corners and edges are covered.
- Spread the prepared berry filling evenly over the crust.
- Leave a small border around the edges if desired.
- Sprinkle the remaining dough evenly over the berry filling.
Don’t worry about covering every bit of fruit. Leaving a few small openings allows the beautiful berry filling to peek through after baking.
Method 5: Bake Until Golden
- Place the baking pan in the preheated oven.
- Bake for 40–45 minutes.
- Check that the top is lightly golden brown.
- The berry filling should look thick and bubbly around the edges.
- Remove the pan from the oven and place it on a cooling rack.
If the top begins browning too quickly, loosely cover it with aluminum foil for the remaining baking time.
Method 6: Cool and Slice
This is one of the most important steps!
Allow the bars to cool completely in the pan for at least 2 hours. The berry filling needs time to set properly.
Once cooled:
- Lift the entire dessert out using the parchment paper.
- Place it on a cutting board.
- Use a sharp knife to cut it into 16 equal squares.
- Wipe the knife between cuts for cleaner edges.
Your beautiful Homemade Berry Crumble Bars are now ready to enjoy!
Professional Baking Tips and Secrets
- Use thick filling: Make sure the berry mixture is properly thickened before adding it to the crust.
- Don’t overmix the dough: A crumbly texture produces a more tender and delicious crust.
- Use cold or frozen berries: Frozen berries work perfectly and don’t need to be thawed first.
- Allow enough cooling time: Cutting the bars while warm can cause the filling to spill out.
- Balance the sweetness: A little lemon juice helps balance the natural sweetness of the fruit.
- Press the bottom firmly: This creates a stable base that won’t fall apart when sliced.
- Watch the baking time: Every oven is different, so start checking around the 35-minute mark.
Delicious Recipe Variations
Raspberry Crumble Bars
Use raspberries for a sweet and slightly tart filling with a beautiful ruby-red color.
Blackberry Crumble Bars
Blackberries create a rich, deep-purple filling with a wonderful fruity flavor.
Strawberry Crumble Bars
Fresh strawberries make these bars sweeter and softer, perfect for spring and summer.
Blueberry Crumble Bars
Blueberries create a beautiful dark filling and pair wonderfully with lemon zest.
Mixed Berry Crumble Bars
Combine raspberries, blueberries, strawberries, and blackberries for a colorful and flavorful dessert.
Almond Berry Bars
Add ½ teaspoon almond extract to the dough and sprinkle sliced almonds over the topping before baking.
Serving Suggestions
These bars are delicious on their own, but there are several ways to make them even more special.
- Serve with a scoop of vanilla ice cream.
- Add a little powdered sugar on top.
- Pair with freshly whipped cream.
- Serve alongside a cup of coffee or tea.
- Add fresh berries as a decorative garnish.
- Drizzle with a little white chocolate for an extra-special dessert.
For a beautiful dessert presentation, arrange the squares on a serving platter and let the colorful berry filling show along the sides.
Why Dessert Lovers Will Love This Recipe
There are so many reasons why these Berry Crumble Bars deserve a place in your recipe collection.
Easy to prepare: Even beginner bakers can make them successfully.
Simple ingredients: Most of the ingredients are already available in a typical kitchen.
Beautiful presentation: The golden crust and deep-red berry filling create an irresistible appearance.
Perfect texture: Buttery, crumbly, soft, fruity, and slightly crisp all at once.
Great for sharing: Cut them into squares and serve them at parties, family gatherings, picnics, or potlucks.
Easy to customize: You can change the fruit depending on the season and your personal preferences.
They are also a wonderful recipe to make with children because the preparation is straightforward and fun.
Storage Instructions
At room temperature: Store the completely cooled bars in an airtight container for up to 1–2 days in a cool environment.
In the refrigerator: Keep them in an airtight container for up to 5 days.
In the freezer: Wrap individual bars in plastic wrap and place them in a freezer-safe container. Freeze for up to 3 months for best quality.
To thaw: Transfer frozen bars to the refrigerator overnight or allow them to thaw at room temperature.
To serve warm: Heat individual bars in the microwave for approximately 10–15 seconds.
Frequently Asked Questions
Can I use frozen berries?
Absolutely! Frozen berries work very well. Add them directly to the saucepan without thawing, and allow a little extra cooking time if necessary.
Why is my berry filling too runny?
The filling may need more cooking time or additional cornstarch. Make sure it thickens before spreading it over the crust.
Can I prepare these bars a day ahead?
Yes! They are excellent make-ahead desserts. In fact, preparing them the day before allows the filling to set beautifully.
Can I use store-bought jam instead of homemade filling?
Yes. You can substitute approximately 2 cups of thick berry jam for the homemade filling. Spread it evenly over the crust before adding the crumble topping.
How do I get perfectly clean slices?
Allow the bars to cool completely, then refrigerate them for 30–60 minutes before cutting with a sharp knife.
Conclusion
These Homemade Berry Crumble Bars are proof that the simplest ingredients can create the most memorable desserts. Between the buttery golden crust, the rich and fruity berry filling, and the delicate crumble topping, every square offers a delicious combination of flavors and textures.
They are easy enough for everyday baking but beautiful enough to serve on special occasions. Whether you choose raspberries, blackberries, blueberries, or a mixture of your favorite fruits, this recipe is wonderfully versatile.
Make a batch for your family, share a few squares with friends, or keep them in the refrigerator for whenever a sweet craving strikes.
One thing is certain: once you make these irresistible Berry Crumble Bars, don’t be surprised if everyone starts asking you for the recipe!
Happy Baking!