1. Introduction
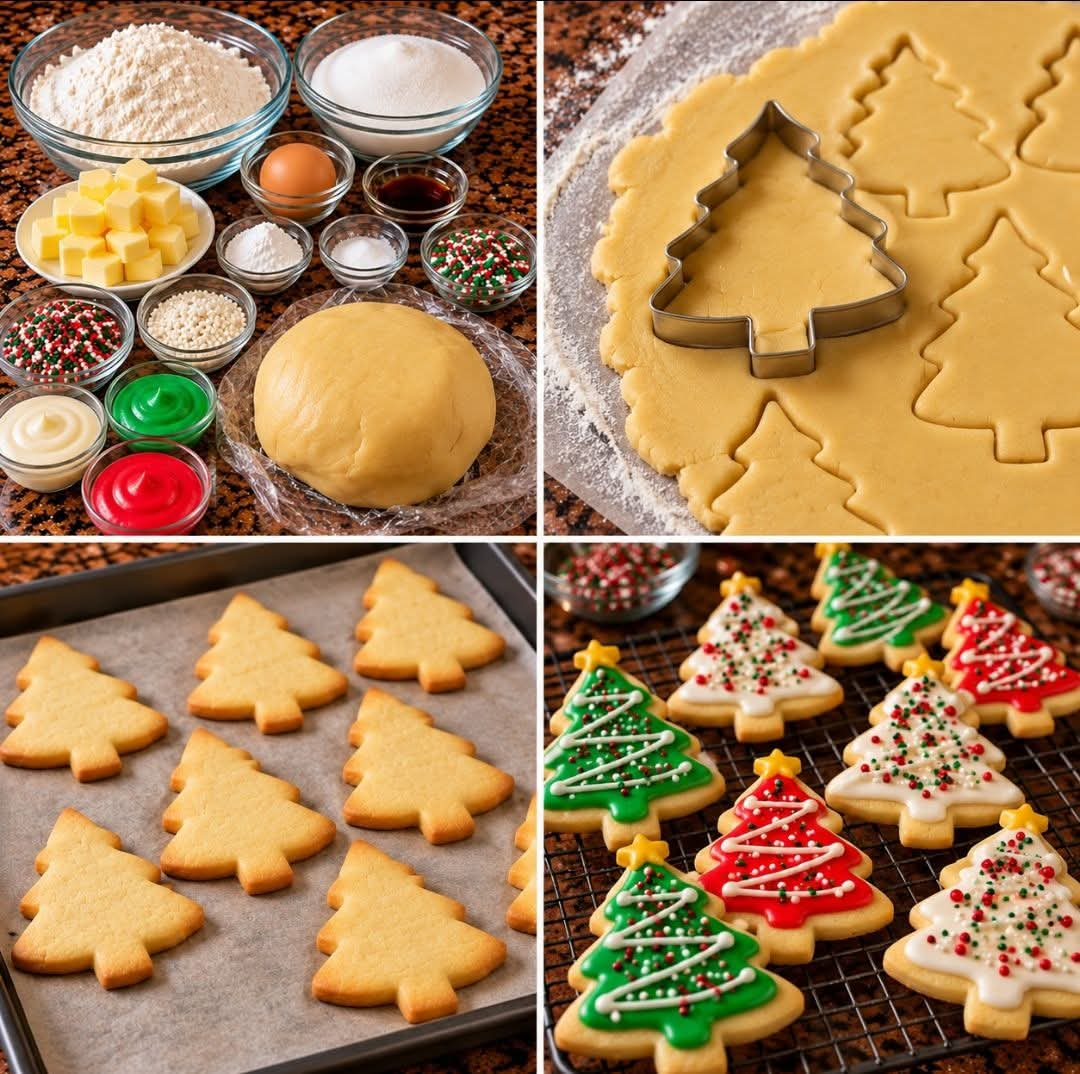
Christmas Tree Sugar Cookies are a delightful holiday treat that combines buttery, tender cookies with colorful red, green, and white icing. Cut into charming Christmas tree shapes and decorated with festive sprinkles, these cookies are perfect for holiday parties, cookie exchanges, family gatherings, and homemade Christmas gifts. Their delicious flavor and beautiful appearance make them a favorite for bakers of all ages.
2. Origin
Sugar cookies have roots in European baking traditions, particularly among German settlers who brought their baking customs to America during the 18th century. Over time, American bakers developed their own versions of these simple, buttery cookies. Decorating cookies with Christmas-themed shapes, colorful icing, and sprinkles became a popular holiday tradition, turning ordinary sugar cookies into festive seasonal favorites.
3. Cultural Significance
Christmas Tree Sugar Cookies represent the joy, creativity, and togetherness of the holiday season. Families often gather in the kitchen to roll out dough, cut festive shapes, and decorate cookies with colorful icing. They are also popular at school celebrations, Christmas parties, bake sales, and cookie exchanges. Sharing homemade cookies is a wonderful way to spread holiday cheer and create lasting memories with loved ones.
4. Ingredients Quantity
Preparation time: 25 minutes · Chilling time: 30 minutes · Baking time: 8–12 minutes · Makes approximately 24–30 cookies
For the sugar cookies
- 2¾ cups (345 g) all-purpose flour
- 1 cup (227 g) unsalted butter, softened
- 1 cup (200 g) granulated sugar
- 1 large egg
- 2 teaspoons vanilla extract
- 1 teaspoon baking powder
- ½ teaspoon salt
For the icing and decoration
- 2 cups (240 g) powdered sugar
- 2–3 tablespoons milk, added gradually
- ½ teaspoon vanilla extract
- Green food coloring
- Red food coloring
- Red, green, and white holiday sprinkles
- Yellow star-shaped sprinkles, optional
5. Optional Additions
Customize your cookies with these delicious extras:
- Almond extract: Replace half the vanilla extract with almond extract for a delicate nutty flavor.
- Citrus zest: Add 1 teaspoon of lemon or orange zest for a refreshing note.
- Chocolate drizzle: Finish the cookies with melted white or dark chocolate.
- Colored sanding sugar: Sprinkle it over the icing for extra sparkle.
- Peppermint flavor: Add a tiny amount of peppermint extract to the icing for a festive twist.
- Edible glitter: Use food-safe glitter for an elegant holiday presentation.
6. Tips for Success
- Use softened butter: It should be soft enough to mix but not melted.
- Chill the dough: Refrigerate for at least 30 minutes to help the cookies retain their Christmas tree shapes.
- Roll evenly: Aim for dough about ¼ inch (6 mm) thick so the cookies bake uniformly.
- Avoid overbaking: Remove the cookies when the edges are just beginning to turn lightly golden.
- Cool completely: Let the cookies cool before adding icing to prevent it from melting.
- Adjust icing consistency: Use less milk for outlining and slightly more for spreading or flooding.
- Decorate creatively: Add zigzag icing, colorful sprinkles, and small stars to create beautiful Christmas trees.
7. Instructions
1. Prepare the dough: In a bowl, whisk together the flour, baking powder, and salt.
2. Cream the butter and sugar: In a separate large bowl, beat the softened butter and granulated sugar until light and creamy.
3. Add the egg and vanilla: Mix until smooth and well combined.
4. Combine the ingredients: Gradually add the dry ingredients to the butter mixture, mixing until a soft dough forms.
5. Chill the dough: Cover the dough and refrigerate for 30 minutes.
6. Preheat the oven: Set the oven to 350°F (175°C). Line baking sheets with parchment paper.
7. Cut out the cookies: Roll the chilled dough on a lightly floured surface to approximately ¼ inch thick. Use a Christmas tree-shaped cookie cutter to cut out the cookies.
8. Bake: Arrange the cookies on the prepared baking sheets, leaving space between them. Bake for 8–12 minutes, depending on their size, until the edges are lightly golden.
9. Cool: Allow the cookies to rest on the baking sheet for a few minutes before transferring them to a wire rack to cool completely.
10. Prepare the icing: Mix the powdered sugar, vanilla extract, and milk until smooth. Divide the icing into separate bowls and tint with green, red, and white food coloring.
11. Decorate: Spread or pipe the icing onto the cooled cookies. Add holiday sprinkles and star decorations while the icing is still wet.
12. Let them set: Allow the icing to dry completely before serving or storing the cookies.
8. Description
These Christmas Tree Sugar Cookies feature a delicate, buttery texture with lightly crisp edges and a soft center. Their sweet vanilla flavor pairs perfectly with smooth icing and festive sprinkles. Decorated in bright green, classic red, and snowy white, each cookie resembles a tiny Christmas tree ready to brighten your holiday dessert table.
9. Nutritional Information
Estimated values per cookie, assuming 30 cookies per batch. Actual nutrition varies with cookie size, icing quantity, and decorations.
| Nutrient | Approximate amount |
|---|---|
| Calories | 150–180 kcal |
| Carbohydrates | 22–27 g |
| Protein | 1–2 g |
| Total fat | 6–8 g |
| Saturated fat | 4–5 g |
| Sugar | 13–18 g |
| Sodium | 40–80 mg |
10. Conclusion
Christmas Tree Sugar Cookies are more than a delicious dessert; they are a fun and meaningful way to celebrate the holiday season. With their buttery flavor, festive shapes, and colorful decorations, they bring warmth and happiness to any Christmas gathering. Whether you make them for family, friends, or a holiday cookie exchange, these treats are sure to become a seasonal favorite.
11. Recommendation
Serve these cookies alongside hot chocolate, coffee, tea, or a warm mug of milk for a cozy holiday treat. They also make wonderful homemade gifts when arranged in decorative tins or festive gift boxes.
For the best results, bake the cookies a day before your celebration and decorate them once completely cool. Store them in an airtight container at room temperature for approximately 5–7 days, provided the icing is fully set and the storage conditions are suitable.
12. Embracing Healthful Indulgence
Enjoying holiday desserts can be part of a balanced lifestyle. To make these cookies a little lighter, consider reducing the sugar in the dough slightly, using a modest amount of icing, and choosing smaller cookie cutters. You can also use naturally flavored extracts or citrus zest to add flavor without extra sugar.
Most importantly, savor each cookie mindfully and enjoy the experience of baking and sharing with others. Christmas Tree Sugar Cookies are a reminder that holiday indulgence is not just about sweetness—it is also about creativity, connection, and the happiness of celebrating together.