
1. Introduction
Bring a little extra magic to your holiday celebrations with these adorable Christmas Ornament Cake Balls! These festive treats combine a soft, moist cake filling with a creamy coating of melted chocolate or candy melts, decorated in beautiful Christmas colors.
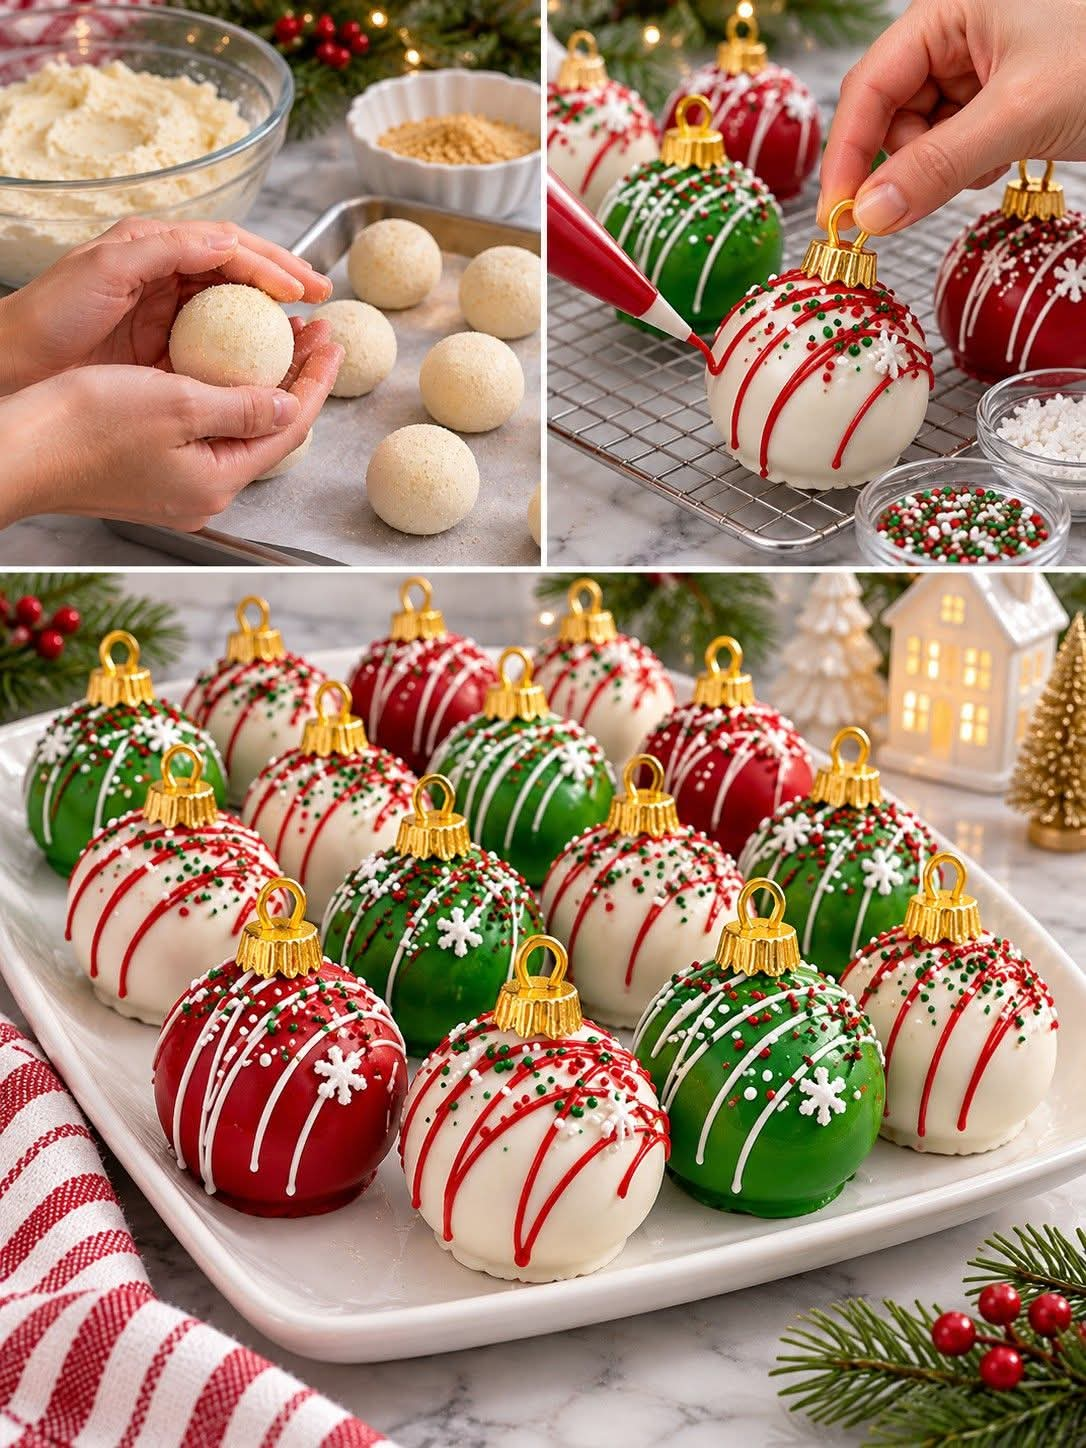
Shaped like miniature Christmas ornaments and finished with red and white drizzles, colorful sprinkles, snowflake decorations, and golden ornament toppers, these cake balls are almost too beautiful to eat!
They make wonderful Christmas party desserts, homemade gifts, and delicious additions to any holiday dessert table.
2. Origin
Cake balls are a modern homemade dessert inspired by traditional cake truffles and cake pops. They became especially popular as a creative way to transform leftover cake into bite-sized treats by combining crumbled cake with frosting and dipping the mixture into melted chocolate.
Over time, bakers began experimenting with different shapes, colors, and decorations. Christmas ornament cake balls are a festive variation that turns ordinary cake truffles into miniature edible holiday decorations.
3. Cultural Significance
Christmas baking is an important tradition in many households, bringing families and friends together during the holiday season.
These ornament-inspired cake balls celebrate the joy of Christmas through creativity, color, and sharing homemade sweets. Their red, green, and white decorations reflect traditional Christmas colors, while their beautiful presentation makes them perfect for holiday parties, cookie exchanges, and gift boxes.
They are also a fun baking activity for children and adults to enjoy together.
4. Ingredients Quantity
Preparation Time: 35 minutes Chilling Time: 1 hour Total Time: Approximately 1 hour 35 minutes Servings: 18–22 cake balls
For the cake balls
- 1 prepared vanilla or white cake (approximately 400 g).
- ½ cup vanilla frosting (approximately 120 g).
- 1 teaspoon vanilla extract.
For the chocolate coating
- 300 g white candy melts.
- 200 g red candy melts.
- 200 g green candy melts.
- 1 tablespoon coconut oil or vegetable shortening, as needed.
For decoration
- Red candy melts for drizzling.
- White candy melts for drizzling.
- Green and red Christmas sprinkles.
- White snowflake sprinkles.
- Edible decorative sugar pearls.
- 18–22 small gold-colored edible ornament decorations or food-safe decorative toppers.
5. Optional Additions
Customize these festive treats with your favorite flavors:
- Chocolate cake: Use chocolate cake instead of vanilla for a richer filling.
- Cream cheese frosting: Adds a slightly tangy and creamy flavor.
- Peppermint extract: Gives the cake balls a refreshing Christmas flavor.
- Crushed candy canes: Add a festive peppermint crunch.
- Coconut flakes: Bring a delicate texture to the filling.
- Almond extract: Adds a lovely bakery-style aroma.
- Edible glitter: Creates a beautiful sparkling holiday finish.
6. Tips for Success
- Allow the cake to cool completely before crumbling it.
- Add frosting gradually to avoid making the cake mixture too wet.
- Chill the cake balls before dipping to help them hold their round shape.
- Melt candy coating gently using short microwave intervals, stirring between each one.
- Add a little coconut oil if the coating is too thick.
- Work with one color at a time to keep the coating smooth and consistent.
- Decorate with sprinkles while the coating is still wet.
- Use only food-safe edible decorations for anything that will be eaten.
- Make sure any gold ornament-shaped toppers are edible and not actual Christmas ornament hardware.
7. Instructions
Step 1: Prepare the Cake
Bake your favorite vanilla cake according to the package instructions or your homemade recipe. Allow it to cool completely.
Step 2: Crumble the Cake
Break the cooled cake into fine crumbs in a large mixing bowl. Add the vanilla extract and gradually mix in the frosting until the mixture holds together when pressed.
Step 3: Shape the Cake Balls
Scoop small portions of the mixture and roll them between your palms to create smooth, evenly sized balls.
Place them on a parchment-lined baking tray.
Step 4: Chill
Refrigerate the cake balls for approximately 30–45 minutes until firm.
Step 5: Melt the Candy Coating
Melt the white, red, and green candy melts separately according to their package instructions. Stir until smooth and glossy.
Step 6: Dip the Cake Balls
Dip each chilled cake ball into the melted coating, making sure it is completely covered. Allow the excess coating to drip off before placing it on a wire rack or parchment paper.
Step 7: Decorate the Ornaments
Drizzle contrasting red or white candy coating over the balls. Add red and green sprinkles, white snowflake decorations, and edible sugar pearls.
Step 8: Add the Ornament Details
Once the coating is set, carefully attach edible gold ornament-style toppers using a small amount of melted candy coating.
Step 9: Set and Serve
Allow the decorations to firm completely. Arrange the finished Christmas ornament cake balls on a beautiful white serving platter and enjoy!
8. Description
These Christmas Ornament Cake Balls are little edible masterpieces!
Each bite features a soft, moist cake center surrounded by a smooth candy coating. The beautiful red, green, and white colors, delicate chocolate drizzles, sparkling sprinkles, and golden details create an elegant Christmas appearance.
They are sweet, festive, and perfect for anyone who loves creative holiday desserts.
9. Nutritional Information
Estimated values per cake ball, assuming 20 servings. Actual values vary depending on cake, frosting, and coating brands.
| Nutrient | Amount |
|---|---|
| Calories | 230 kcal |
| Protein | 2 g |
| Carbohydrates | 32 g |
| Fat | 11 g |
| Saturated Fat | 7 g |
| Sugar | 25 g |
| Fiber | 1 g |
| Sodium | 110 mg |
10. Conclusion
Christmas Ornament Cake Balls are the perfect combination of delicious flavor and festive creativity. With their soft cake centers, sweet chocolate coating, and charming Christmas decorations, they are guaranteed to bring smiles to your holiday celebrations.
Whether you’re preparing them for a Christmas party, gifting them to loved ones, or creating a beautiful dessert table, these little treats are sure to become a holiday favorite.
11. Recommendation
For the most beautiful Christmas dessert presentation:
- Arrange the cake balls on a white ceramic serving platter.
- Mix red, green, and white ornaments for a traditional Christmas look.
- Add a few edible snowflake decorations.
- Place them in individual holiday cupcake liners for gifting.
- Serve alongside hot chocolate, coffee, or a warm cup of Christmas tea.
My recommendation: Make a combination of all three colors. The contrast between red, green, and white creates a stunning Christmas dessert display!
12. Embracing Healthful Indulgence
Holiday celebrations are all about enjoying special moments and delicious homemade treats. These Christmas cake balls are an indulgent dessert, but you can make small adjustments to suit your preferences.
Consider using a little less frosting, choosing smaller portions, and decorating with fewer sugary toppings. You can also prepare mini cake balls to create satisfying bite-sized treats.
Remember, a balanced approach to holiday eating means enjoying your favorite seasonal desserts without guilt while appreciating the joy of homemade baking.
Happy Christmas baking!